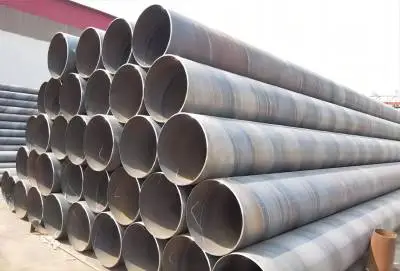
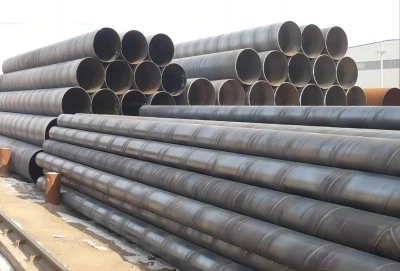
Spiral welded pipes have become increasingly popular in various industries due to their unique manufacturing process, which offers several advantages over traditional longitudinal welded pipes. This article delves into the intricate steps involved in producing spiral welded pipe, from raw material preparation to final quality control measures. Understanding this process is crucial for engineers, project managers, and procurement specialists to appreciate the quality and reliability of spiral welded pipes.
|
|
|
Raw material preparation:
The manufacturing process of spiral welded pipes begins with the careful selection and preparation of raw materials. The primary raw material used is steel strip coils, which serve as the foundation for the entire pipe structure. The quality of these steel strips is paramount, as it directly influences the final product's performance and durability.
Before being approved for use in pipe production, the steel strips undergo rigorous physical and chemical tests. These tests evaluate various properties of the steel, including:
1. Chemical composition: Ensuring the steel contains the correct proportions of elements such as carbon, manganese, and silicon.
2. Tensile strength: Measuring the steel's ability to withstand tension without failure.
3. Yield strength: Determining the point at which the steel begins to deform plastically.
4. Elongation: Assessing the steel's ductility and formability.
5. Impact toughness: Evaluating the steel's ability to absorb energy during sudden impacts.
6. Hardness: Measuring the steel's resistance to indentation and wear.
Only steel strips that meet or exceed the specified standards are approved for use in spiral welded pipe production. This stringent quality control at the raw material stage is crucial for ensuring the final pipe's integrity and performance.
Additionally, the width and thickness of the steel strips are carefully selected based on the desired pipe dimensions. The ability to use a single strip width to produce pipes of various diameters is one of the key advantages of the spiral welding process, offering flexibility in production without significant retooling.
Forming:
Once the raw materials have passed quality control, the forming process begins. This stage transforms the flat steel strip into a cylindrical shape, setting the foundation for the final pipe structure.
The process starts with unrolling the steel strip coil and feeding it through a series of rollers that flatten and straighten the material, removing any residual curvature from the coiling process. This ensures a uniform starting point for the forming operation.
Next, the flattened strip is guided into the forming section of the production line. Here, a set of angled rollers gradually bends the steel strip into a cylindrical shape. The angle of these rollers is precisely calculated and adjusted to achieve the desired pipe diameter. This forming process can be controlled using either external or internal roll forming techniques:
1. External roll forming: In this method, the rollers are positioned on the outside of the forming cylinder, applying pressure to shape the steel strip.
2. Internal roll forming: This technique uses rollers placed inside the forming cylinder, which is particularly useful for producing pipes with larger diameters.
The choice between external and internal roll forming often depends on the pipe's size and the manufacturer's equipment capabilities. Both methods can produce high-quality spiral welded pipes when properly implemented.
As the steel strip is formed into a cylinder, it creates a helical seam that will be welded in the next stage of production. The forming process must be precisely controlled to ensure the edges of the steel strip align properly for welding, maintaining consistent diameter and roundness throughout the pipe's length.
Welding:
The welding stage is critical in the production of spiral welded pipe, as it transforms the formed cylinder into a unified, structurally sound pipe. The most common welding technique used in this process is submerged arc welding (SAW), known for its efficiency and high-quality results.
In submerged arc welding, an electric arc is formed between the pipe and a continuously fed electrode wire. This entire process occurs beneath a layer of granular flux material, hence the term "submerged." The flux serves several important functions:
1. It shields the weld pool from atmospheric contamination.
2. It stabilizes the arc, improving weld quality.
3. It adds alloying elements to the weld, enhancing its mechanical properties.
4. It forms a protective slag over the weld as it cools.
The welding process is typically performed using multiple welding heads to increase production speed and ensure thorough fusion. As the pipe rotates and moves along the production line, the welding heads deposit weld metal along the helical seam formed during the shaping process.
At the end of each pipe section, a cross weld is created to join the spiral seam to the rear edge of the steel strip. This cross weld ensures continuity in the pipe structure and allows for the production of pipes in theoretically unlimited lengths.
The welding parameters, including current, voltage, and travel speed, are carefully controlled and monitored throughout the process to ensure consistent weld quality. Advanced welding systems often incorporate real-time monitoring and adjustment capabilities to maintain optimal welding conditions.
Weld control:
Maintaining precise control over the welding process is crucial for producing high-quality spiral welded pipes. A key aspect of this control is managing the weld gap and alignment. Specialized weld gap control devices are employed to ensure that the edges of the steel strip are properly positioned for welding.
These control systems typically use sensors to monitor the gap between the edges of the steel strip as it enters the welding zone. If any deviation from the specified gap is detected, automatic adjustments are made to the forming rollers or the strip feed mechanism to correct the alignment.
Proper gap control is essential for several reasons:
1. It ensures complete fusion of the weld, preventing defects such as lack of penetration or incomplete fusion.
2. It helps maintain consistent weld bead geometry, which is important for the pipe's structural integrity.
3. It contributes to achieving the required diameter tolerances for the finished pipe.
4. It minimizes the risk of weld defects that could lead to pipe failure in service.
In addition to gap control, the alignment of the strip edges is closely monitored to prevent misalignment, which could lead to weakened welds or dimensional inaccuracies in the finished pipe. Advanced optical or laser-based systems are often used to track and adjust the alignment in real-time during the welding process.
Non-destructive testing:
The final stage in the spiral welded pipe manufacturing process involves comprehensive non-destructive testing (NDT) to ensure the integrity of the welds and the overall quality of the pipe. This testing is typically performed using online continuous ultrasonic automatic flaw detection equipment.
Ultrasonic testing offers several advantages for inspecting spiral welded pipes:
1. It can detect both surface and subsurface defects.
2. It provides 100% coverage of the spiral weld.
3. It can be performed at high speeds, allowing for real-time quality control during production.
4. It is non-destructive, preserving the integrity of the pipe while ensuring its quality.
The ultrasonic testing system typically consists of multiple transducers arranged to cover the entire weld area. As the pipe moves through the testing station, these transducers emit high-frequency sound waves that penetrate the weld. Any discontinuities or defects in the weld will reflect these sound waves differently, allowing the system to detect and locate potential flaws.
If a defect is detected, the system automatically triggers an alarm and marks the location of the flaw on the pipe. This immediate feedback allows production workers to quickly adjust process parameters to correct any issues and prevent further defects.
In addition to ultrasonic testing, other NDT methods may be employed depending on specific requirements or standards. These can include:
1. Radiographic testing for detecting internal defects.
2. Magnetic particle inspection for surface and near-surface defects.
3. Eddy current testing for detecting surface breaking defects.
The combination of these testing methods ensures that spiral welded pipes meet the highest quality standards and are suitable for their intended applications.
Spiral Welded Pipe Manufacturers:
The company's commitment to quality is evident throughout their manufacturing process, from raw material selection to final testing. They employ state-of-the-art equipment and adhere to stringent quality control measures to produce pipes that meet or exceed industry standards.
For those in the process of selecting a spiral welded pipe manufacturer for their projects, Longma welcomes inquiries and consultations. Their team of experts can provide detailed information about their products, customization options, and how their pipes can meet the specific requirements of various applications. Interested parties can reach out to Longma at info@longma-group.com to discuss their project needs and explore potential solutions.


